Creating a Hostinger VPS for Next.js
Taylor Segell

- Published on
Provisioning a VPS on Hostinger: A Step-by-Step Guide
Before deploying your Next.js application, you'll need to provision (create and set up) a VPS on Hostinger. Here's how to do that:
1. Log In to Your Hostinger Account
- Go to the Hostinger website and log in to your account.
2. Navigate to the VPS Section
- Find the "VPS" or "Servers" section in your Hostinger dashboard. It's usually under "Hosting" or "Services."
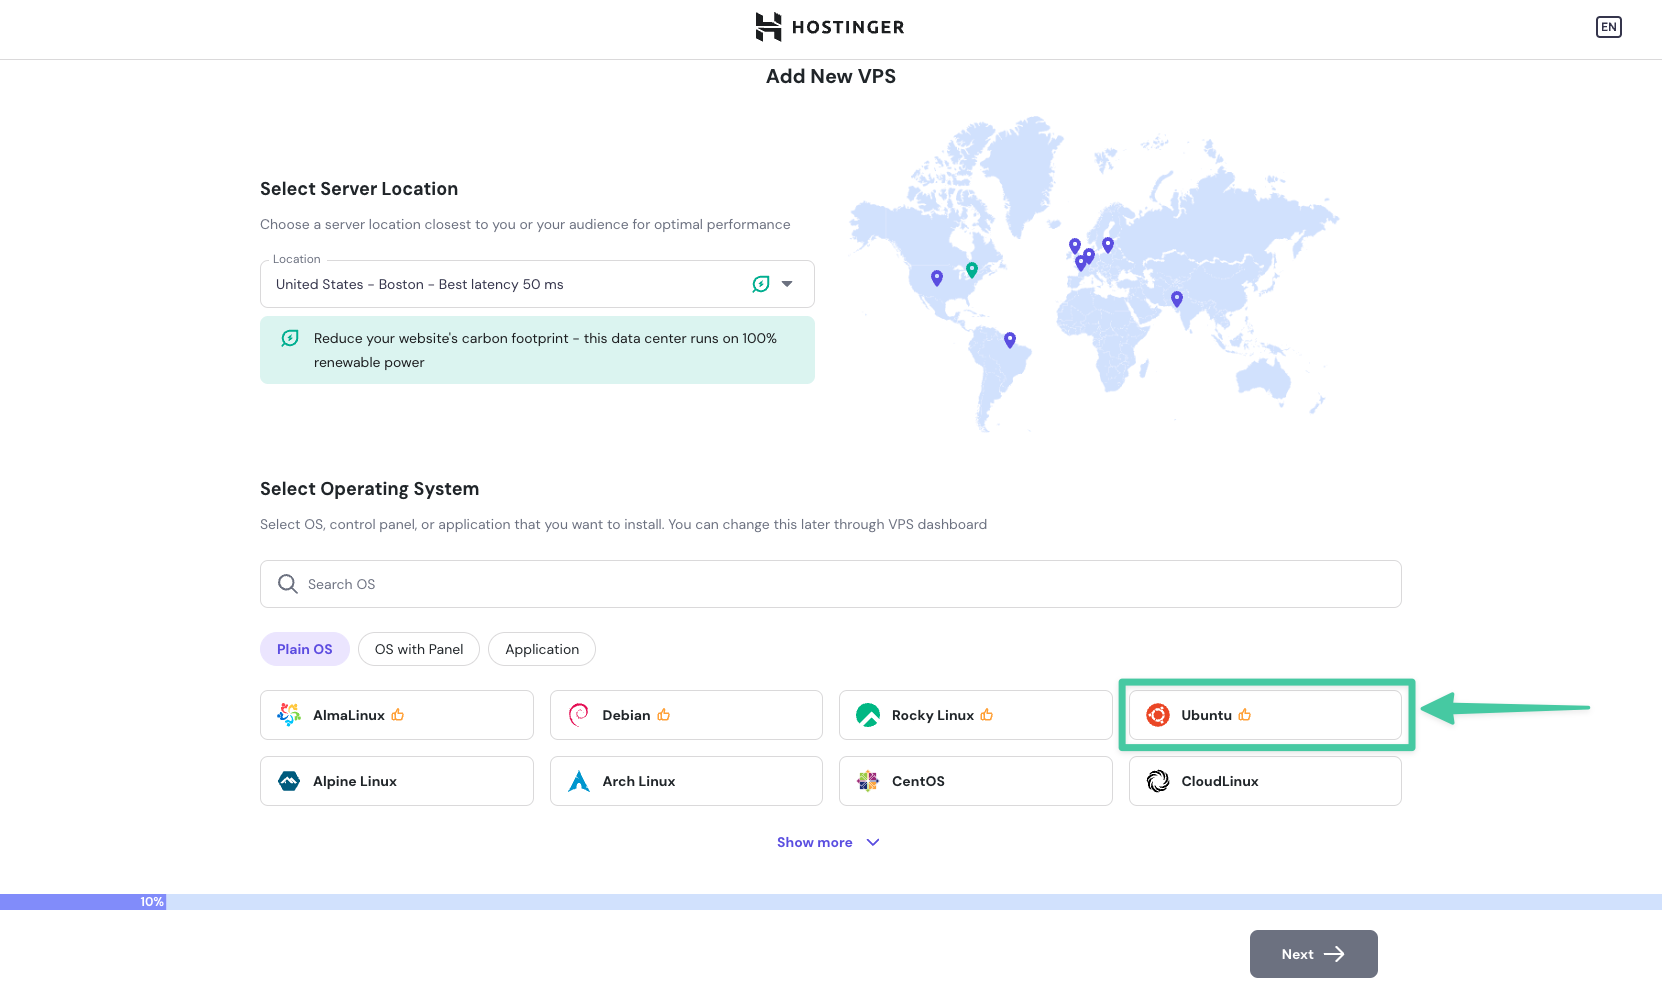
3. Select a Server Location & Operating System
- Hostinger offers a list of server locations. Choose the location that is closest to your target audience. For example, if your audience is primarily in the United States, choose a server located there.
- You'll be prompted to select an operating system (OS) for your VPS.
- For this guide, we recommend choosing Ubuntu 22.04 or Ubuntu 24.04 (or the latest version). Ubuntu is a stable and well-supported Linux distribution, making it a good choice for both beginners and experienced users.
- Other Linux options, such as CentOS and Debian, are also acceptable, but this guide focuses on Ubuntu.
4. Add Security Information
- Create a memorable root password and make sure you save that for later or you will not be able to access your server
- Add an SSH key, this is will be crucial when it comes to those of you all who will be using a private git repository.

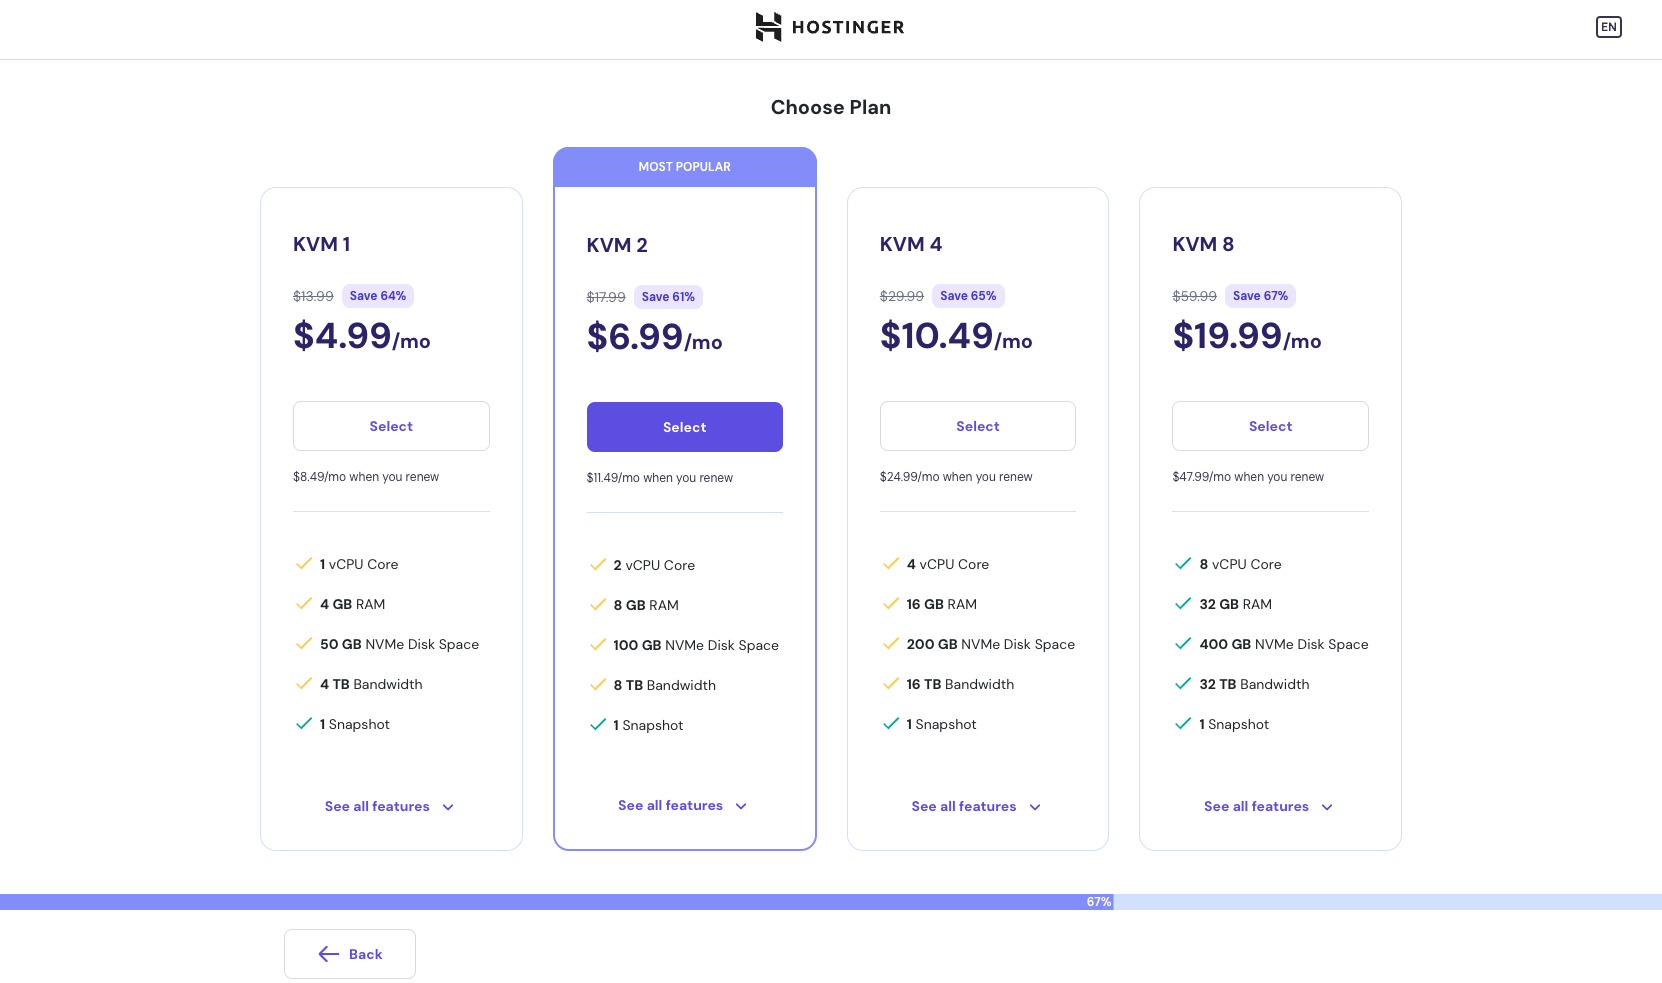
5. Choose a VPS Plan
Hostinger offers several VPS plans with different specifications. Here’s a breakdown to help you choose:
| Plan | Price | CPU | RAM | Storage | Bandwidth | Best For | Link |
|---|---|---|---|---|---|---|---|
| KVM 1 | $5.49 | 1 vCPU | 4 GB | 50 GB | 4 TB | Very simple sites with very low traffic | KVM 1 |
| KVM 2 | $7.49 | 2 vCPUs | 8 GB | 100 GB | 8 TB | Low to mid-range traffic, and applications with moderate complexity | KVM 2 |
| KVM 4 | $11.99 | 4 vCPUs | 16 GB | 200 GB | 16 TB | Mid to high traffic websites, more complex applications | KVM 4 |
| KVM 8 | $24.99 | 8 vCPUs | 32 GB | 400 GB | 32 TB | Enterprise-scale websites, high-performance applications | KVM 8 |
Recommendation: If you are unsure, start with the KVM 2 plan, which is the most popular and usually offers sufficient resources for most sites. You can always upgrade later as your site grows.
7. Review and Purchase
- Review your selected plan, operating system, server location, and any additional options.
- Complete the purchase.
8. Access Your VPS Details
- Return to the homepage of hostinger and from there select the VPS tab in the left sidebar
- From there you will click on the Manage button on the right to access your server's information.
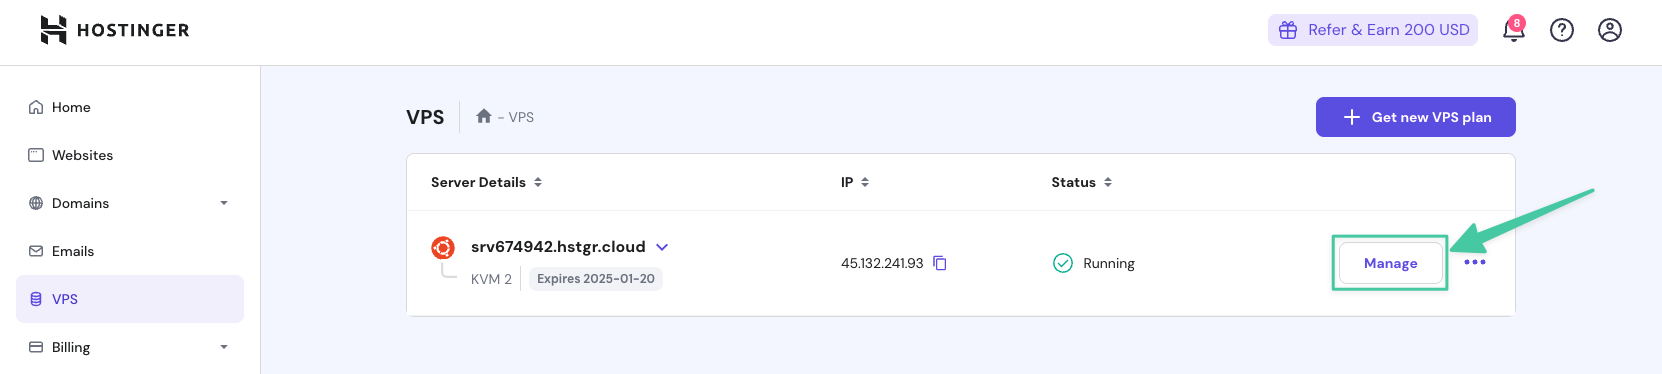
- After your VPS is provisioned, you'll receive an email containing the following information:
- IP Address: The public IP address of your VPS, needed to connect via SSH and point your domain.
- Username: The user name for your VPS (usually
root). - Password: The password for your VPS.
- Hostname: The hostname of your VPS.
- Keep this information safe as it will be required to interact with your server.
Choosing the Right VPS Tier
When selecting the appropriate VPS plan on Hostinger, consider these factors:
- Application Complexity: Simple, static sites (personal blogs, portfolios) work well on entry-level tiers. More complex apps or sites with heavy traffic will need mid or higher-tier plans.
- Expected Traffic: Websites with a lot of users, especially in short bursts, require more RAM and CPU. Insufficient resources could lead to performance issues.
- Budget: Choose a plan within your budget. You can always scale up later if needed.
- Future Growth: Ensure you select a plan that supports potential growth and resource demands over time.
Recommendation:
- For simple Next.js blogs or portfolios: KVM 2 is usually sufficient.
- For more complex applications: Consider KVM 4.
- For high-traffic or enterprise applications: Go for KVM 8.
By selecting the right VPS plan, you’ll ensure that your application runs smoothly. Let me know if you have any more questions!
Newsletter
Stay tuned
Articles, links, and notes on data, AI, and building—roughly weekly in your inbox.